Looking to send out just a handful of phishing templates? Fixed-length campaigns are the tool you've been looking for.
Skip Ahead to the Configuration Step
Step 1: Navigating to Custom Phishing Campaigns
If you aren't already at the home screen of the client portal, start by navigating to the home screen.
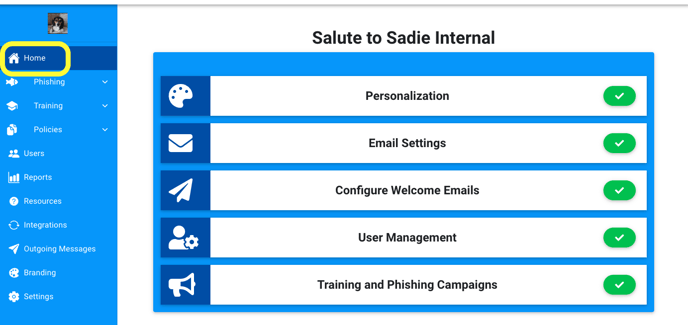
Once here, we need to get into the Phishing Dashboard. There are two paths to get to the Phishing Dashboard.
- Getting to the dashboard via our Training and Phishing Campaigns tab.
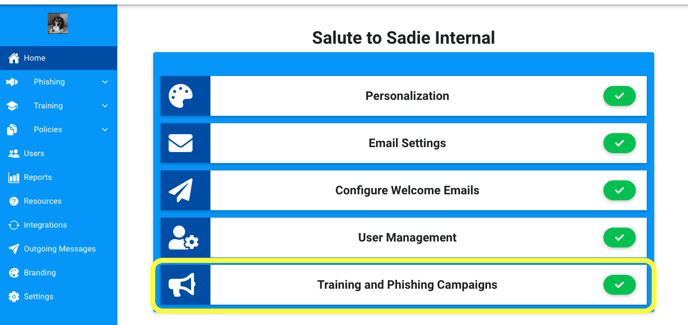
- Start by clicking on the Training and Phishing Campaigns tab.
- Once there, you will see three buttons (training dashboard, continuous campaign creator, and phishing dashboard); click on the Phishing Dashboard button to be brought to the phishing dashboard.
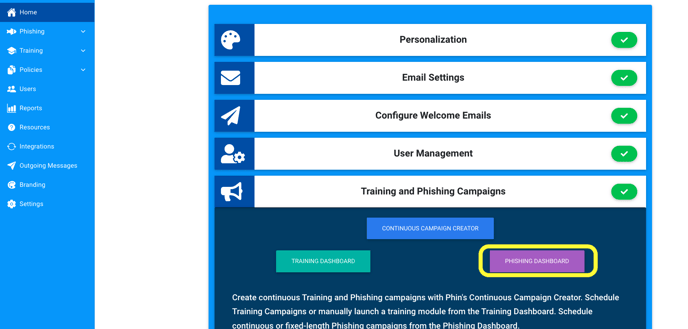
- Start by clicking on the Training and Phishing Campaigns tab.
- Getting to the dashboard via the left-hand side menu.
- Start by clicking on Phishing in the left side hand menu.
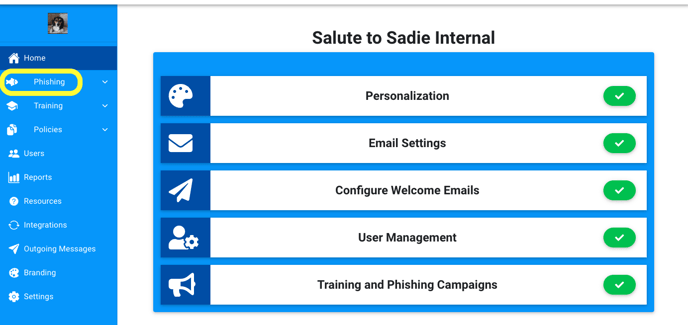
- Once the drop-down menu appears, click on Campaigns.
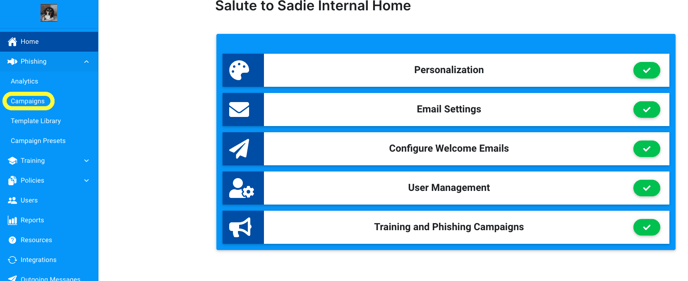
- Start by clicking on Phishing in the left side hand menu.
Now that you're in the Phishing Dashboard, you will see two buttons at the top of the page. Click on Launch a Phishing Campaign to go into the custom campaign creator tool.

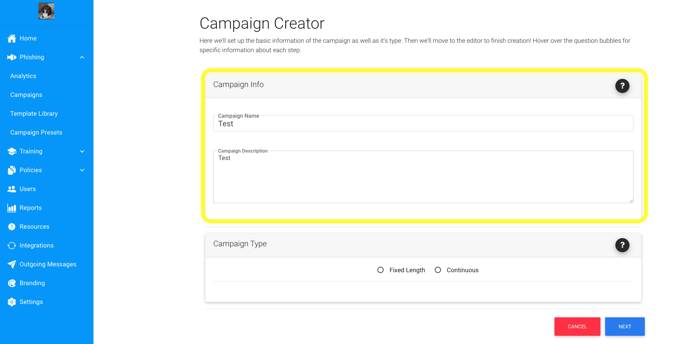
Once within the custom campaign page, you will see two sections...
- Campaign Info
- Campaign Type
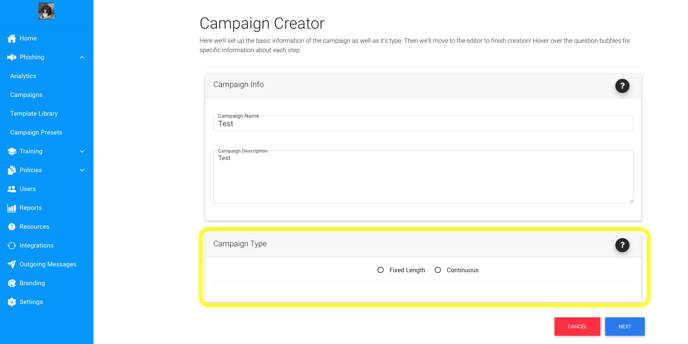
Finally, select Fixed Length and click Next to begin configuring your campaign.

Step 2: Configuring your Fixed-Length Campaign
Configuring custom campaigns is easy to do! Just follow the steps below.
- Select an audience
- The first step to this campaign is selecting the audience you'd like this to deliver to. You can choose any option that best fits your goals for this custom campaign.

- The first step to this campaign is selecting the audience you'd like this to deliver to. You can choose any option that best fits your goals for this custom campaign.
- Select your sending channels

- Select your Learning Type(s)

- Select the Template Categories to be included in your campaign

You can select as many as you'd like for your custom fixed-length campaigns. - Finally, you just need to select your publishing options.
You have three options for publishing,
- Save and Launch
- Launch Campaign
- Run a Preview
Click either of the links to learn more about each of the above options, or select Launch Campaign to simply launch the campaign without saving it as preset or running a preview.
Finally, click Next at the bottom of the page to move on to scheduling.
Step 3: Scheduling your Fixed-Length Campaign
You will now be brought to the Campaign Launcher page. Here you will see the scheduling tool and a summary of the selections you made on the configuration page. The soonest a fixed-length campaign can be scheduled to send is 24 hours in advance. This is done by adjusting the start date seen below.
You only have a few steps left to complete before launching your new campaign!
- Set the schedule to the perimeter that fits your goals for the campaign.
- Review the sending channels and templates selected.
The last step is to click launch!
Much like continuous phishing campaigns, fixed-length phishing campaigns will send over a phishing window of 3-7 days, sending different templates to different users at different times. To learn more about when phishes get sent, check out this article: When will Phishing Campaigns Deliver?
If you have any further questions, don't hesitate to reach out!